How To Root and Install TWRP Recovery On Galaxy Tab A6 LTE SM-T285
Warning:Gammerson.com will not be held responsible for any damage occurred to your Galaxy Tab A6 LTE (SM-T285)during or after the rooting process. Proceed at your risk.

Requirements:
- It is highly recommended to make a proper backup of your contacts, messages, photos, videos and other valuable data on your phone.
- Make sure that your Galaxy Tab A6 LTE is on Android 5.0.2 Lollipop firmware.
- The battery level of your phone should be at least up to 70% to avoid unexpected shutdowns while rooting.
- Enable USB Debugging on your phone by navigating to Settings > Developer Options
- Download and install Samsung USB driver on your PC from download section
Download Section:
How to Install TWRP & Root Samsung Galaxy Tab A6 LTE SM-T285
Step 1: – First, download the TWRP Package (TWRP_3.0.2-1_SM-T285_20161124.zip), Odin tool (Odin v3.10.7) and SuperSU (SR2-SuperSU-v2.79-SR2-20170103215521.zip) files on the desktop of your PC for Galaxy Tab A6 LTE.
Step 2: – Copy/paste the SuperSU file to the internal storage of your device.
Step 3: – Extract the TWRP file to get the file with .tar extension and Odin flashing tool also to get the Odin3_v3.10.7.exe file.
Step 4: – Switch off the Galaxy Tab A6 LTE to boot into the Download Mode.
Step 5: – Switch on the device while pressing and holding Volume UP + Home + Power buttons at the same time. Once a warning screen with a yellow triangle sign appears, press the Volume Up button to enter into Download Mode.
Step 6: – Run Odin as administrator on the PC.
Step 7: – Connect the phone using its USB data cable with the PC.
Step 8: – Once the Galaxy Tab A6 LTE is connected successfully with the PC, the ID: COM port will turn Blue on Odin, and you’ll see “Added!!” message.
Step 9: – Click on the AP button in Odin and locate the firmware file (TWRP-Tab A6 LTE.tar) that you have already extracted. Select it.
Step 10: – Ensure that the Auto Reboot and F. Reset Time options are checked, and the Re-Partition option should be unchecked.
Step 11: – Begin the TWRP installation by clicking on the Start button in Odin. This process may take a few minutes.
Step 12: – A PASS! Message will be displayed on Odin after the TWRP installed successfully and the device will restart.
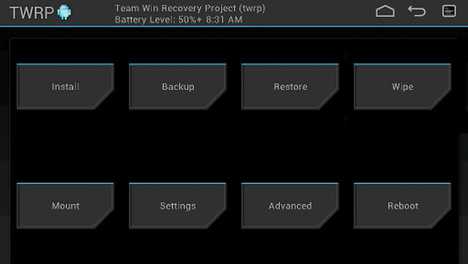
Step 13: – Disconnect the device and turn it OFF to boot into TWRP recovery mode.
Step 14: – Turn ON the phone by pressing and holding the Volume Up + Home + Power buttons altogether to boot into the TWRP recovery.

Step 15: – Tap the Install button in TWRP and select the –SuperSU-v2.46.zip.
Step 16: – After the installation is completed, reboot the system.
Done! You have successfully Install TWRP Recovery and Rooted your Galaxy Tab A6 LTE via Odin.
![{How To} Install TWRP Recovery and Root Samsung Galaxy Tab E [SM-T377P/SM-T560NU] [Guide]](https://i0.wp.com/www.gammerson.com/wp-content/uploads/2017/07/maxresdefault-3.jpg?resize=350%2C200&ssl=1)
![How to root Samsung Galaxy Tab S on lollipop 5.0.2[Step by Steps]](https://i1.wp.com/www.gammerson.com/wp-content/uploads/2015/04/samsung-galaxy-tab-s-review-1.jpg?resize=350%2C200&ssl=1)
![How to install TWRP Recovery and Root Samsung Galaxy Tab S3 [SM-T820/T825]](https://i0.wp.com/www.gammerson.com/wp-content/uploads/2017/04/Samsung-Galaxy-Tab-S3-1-700x467.jpg?resize=350%2C200&ssl=1)