The Samsung Galaxy A9 sports a 16-megapixel rear camera with PDAF (phase detection autofocus), an f/2.0 aperture and dual-tone LED flash .The 8-megapixel front camera sports an 84-degree wide angle lens.It has a Snapdragon 652 processor which is a good processor.It comes with 5000 mAh battery capacity which can last for two days with mixed usage.
Many of the users in today’s world like to root, install the custom recovery on their Android device . However, they will be ending by bricking their device.Rooting process or some ROM’s are not secure enough. The insecure process may brick your device. Bricked device may be no longer able to boot properly. But luckily most of the bricked devices can be unbricked. So in this article, we will guide you how to unbrick A9 Pro SM-A910F.

Disclaimer:
Gammerson.com is not responsible for any damage happened to your device(s) while following this guide, Proceed at your own risk.
PRE-REQUISITES
- Make sure to check your device model number before you proceed further. The guide is dedicated only for Samsung Galaxy A9 Pro SM-A910F and you should not try it on any other device.
- To check the device’s model, you could visit the ‘About phone’ section or could see the outer box of the handset
- It is recommended to take a backup your phone before proceeding Further.
- Make sure that your phone’s percentage will be more than 60%
Downloads
⇒ Download the stock firmware of Samsung Galaxy A9 Pro SM-A910F from following links:
- A910FXXU1APF8| Filename: XXV-A910FXXU1APF8-20160623194300.zip | Android 6.0.1 Marshmallow
- A910FXXU1APF8| Filename: XME-A910FXXU1APF8-20160623110858.zip | Android 6.0.1 Marshmallow
- Download the Odin flashing tool from → here.
How to flash stock firmware on Samsung Galaxy A9 Pro and unbrick it
- Turn off your device.
- Now Press and hold ‘Volume Down, Home and Power buttons’ at same time and release them when you see Android Logo with warning!
- Now press ‘Volume UP’ to get in to Download mode. (Download mode – it helps to flash firmware on most of the Samsung’s devices)
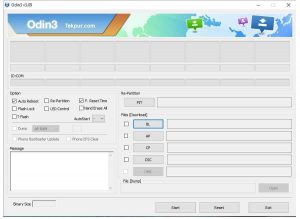
- Now head onto PC, from the Odin folder, double-click on 0.9.exefile to run it. The program will run just like below:
- Now connect your phone to computer/PC using a USB cable. Now head onto Odin program, the ID:Com section should turn to light blue or green that tells that device has been connected properly.
- Note:In case it does not turn to any of these colors, make sure to install USB drivers again to your PC and re-connect it.
- Now under the Odin program, Select “AP” and then find and locate .md5 filefrom the extracted folder of firmware. Do not make any other changes.

- Now, click on “Start” button to start the process.
- As soon as the process gets completed, PASS!message will get displayed over the Odin screen and now you can disconnect the device.
Your phone will restart and soon take you to the home screen. Enter your Google account details to get started with it.
If still any queries are left in your mind,feel free to ask us in the comment Section
